Tutorial 3: Setting up pyWaPOR for your own case study
2. PyWaPOR project set up
To set up pyWaPOR for your own case study you require the following information to configure the set up:
- project folder
- bounding box of the Area-of-Interest (AoI)
- study period, which is usually the start and end of the cropping season

project_folder =  r"D:\\pywapor\\Case_study" #Path to folder
bb = [xmin, ymin, xmax, ymax] #Bounding box of your area
period = ["YYYY-MM-DD", "YYYY-MM-DD"]
# Set up a project.
project = pywapor.Project(project_folder, bb, period)
2.1. Folder
Replace the value of project_folder in the code above with the absolute path to your project folder. Since you've started Jupyter Notebook in your working folder (e.g., D:\\pywapor), if you use relative path (i.e., "Case_study"), the pywapor.Project function will create a new folder in your working folder named "Case_study" (e.g., D:\\pywapor\Case_study).
Notes
- When changing Area-of-Interest, Period, or project configuration, it's better to create a separate project folder
2.2. Area-of-Interest
Replace the value of bb in the template code above with the a list of minimum longitude, minimum latitude, maximum longitude, and maximum latitude of your study area. If you have a shapefile of your study area (with EPSG:4326 coordinate reference system), the bounding box of your study area can be found from a shapefile extent. Open the shapefile in QGIS. Then, right-click on the shapefile layer in the Layers panel and select 'Properties'. In the 'Information' tab, copy the coordinate of the 'Extent'. See the example below.
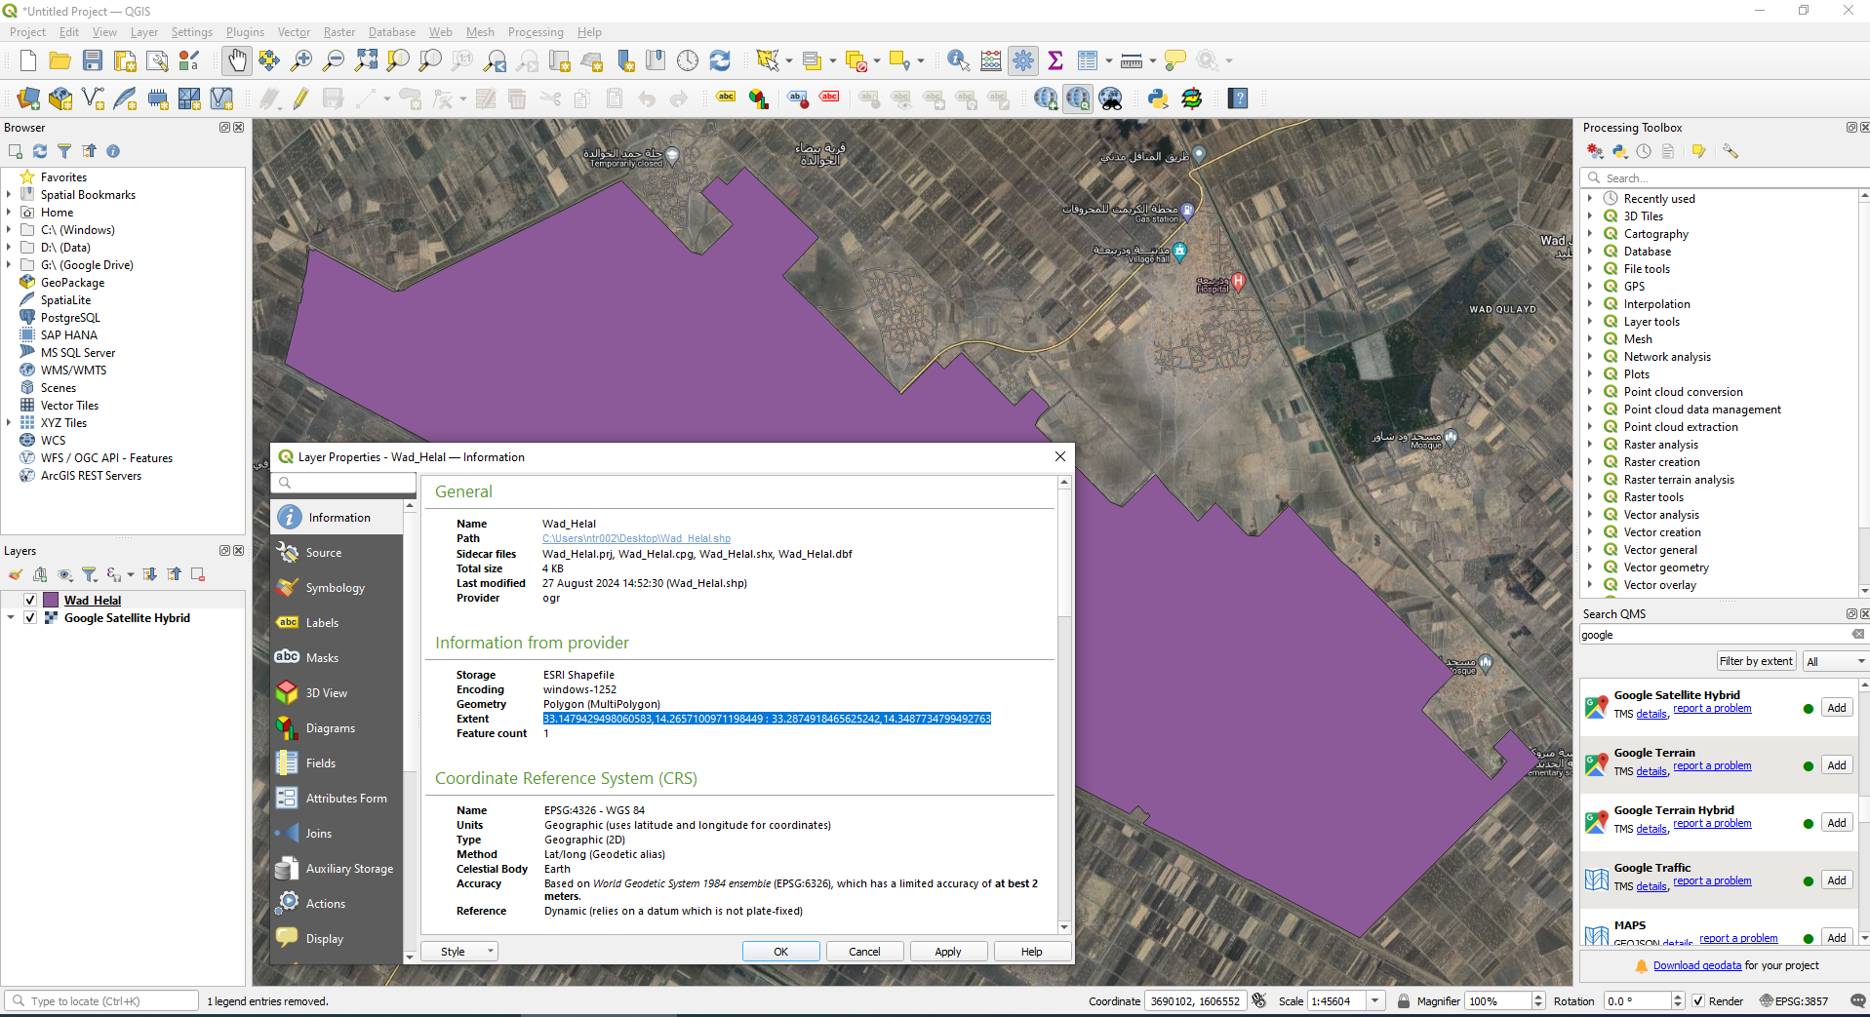
Paste the copied coordinates to the code cell in Jupyter Notebook, then reformat the value from xmin, ymin: xmax, ymax to [xmin, ymin, xmax, ymax]
2.3. Period
Replace the value of period in the template code above with the a list of starting date and ending date of your study period in the format ["YYYY-MM-DD", "YYYY-MM-DD"].
Depending on the size of your area and the capacity of your computer, long period (a few months to more than a year) might overload your computer processing memory. As we are running the script on a regular laptop (8GB RAM), we can only download and process 1 month of data. Select a month in the middle of your cropping season and add 5 days before and 5 days after to have buffer period for interpolation of dates with missing data.
For example, if your cropping season is from 2020-10-01 to 2021-04-30, select the middle month from 2021-01-01 to 2021-01-31. Then add 5 days before and after this period. Then, the value of period should be ["2020-12-25", "2021-02-05"].
After filling the project set-up code cell with the required information of your project, run the code cell.