Tutorial 1: Installing Jupyter Notebook
| Site: | IHE DELFT OPENCOURSEWARE |
| Course: | PyWaPOR OpenCourseWare |
| Book: | Tutorial 1: Installing Jupyter Notebook |
| Printed by: | Guest user |
| Date: | Friday, 26 December 2025, 6:55 PM |
Description
For running pywapor locally on your laptop, you need to install Python program and install pywapor package in your python environment. This can be done in several ways, however, we recommend you use Mamba package manager, because it is fast, robust, and cross-platform.
Once you have python and pywapor installed, you can run pywapor model through Python console (command line interface). However, we recommend you to use Jupyter Lab interface. JupyterLab is a web-based interactive development environment for notebooks, code, and data. It will allows you take notes, interact with you python scripts and save the outputs in digital notebooks.
In this book, we will take you through the steps to install python and python packages on your PC. The instructions are adapted from GISOpenCourseWare
1. Installing Jupyter Notebook
In the next subchapters you'll learn to:
- Install Mamba
- Access the Miniforge prompt
- Create a Python environment
- Clone a GitHub repository
- Use Jupyter Lab
2. Install Mamba and accessing the Miniforge prompt
Install Mamba and accessing Miniforge
A package manager is a tool that allows you to manage the dependencies for your project that are not part of the Python standard library. Dependencies are code that is required for your program to function properly, often in the form of packages.
Pip is the most popular package manager for Python, which can install packages from many sources. The Python Package Index, PyPI, is the primary source.
Although Pip is fine for general Python computing, it is preferred to use package managers that can create isolated environments that can be used to manage dependencies for different projects. Conda is the most popular one. A newer package manager is Mamba, which is faster than conda.
1. Download the Miniforge installer for Windows from the official Miniforge GitHub repository.
2. Install Miniforge. Follow these instructions from the excellent tutorial by Christian Mills.
On Windows we use Mamba through the Miniforge prompt, which is a command-line interface for interacting with conda environments.
Follow these steps in the tutorial by Christian Mills.
3. Create a Python environment
Before setting up a new Python environment, let's review the advantages of virtual environments and why they are crucial for Python projects (from Christian Mills tutorial).
- Isolation of Dependencies: Virtual environments create isolated spaces for each project, allowing developers to install and manage different package versions without conflicts. This isolation ensures that the specific dependencies required for one project do not interfere with or break the dependencies of another project.
- Easier Project Management: Virtual environments help streamline project management by maintaining separate configurations for different projects. Developers can replicate or share project environments with team members, ensuring consistent behavior across various machines. Shareable project environments help developers collaborate, troubleshoot, and deploy projects.
- Simplified System Maintenance: Using virtual environments helps developers avoid cluttering their system-wide Python installation with numerous packages and varying versions. System maintenance is cleaner as developers can easily add, update, or remove packages within individual project environments without affecting other projects or the system as a whole.
3.1. Create pyWaPOR environment
To install the pyWaPOR environment, go to your Miniforge Prompt and type
mamba create -n pywapor_env pywapor jupyterlab geopandas
Once the prompt below popped up, type Y then ENTER to confirm installing new environment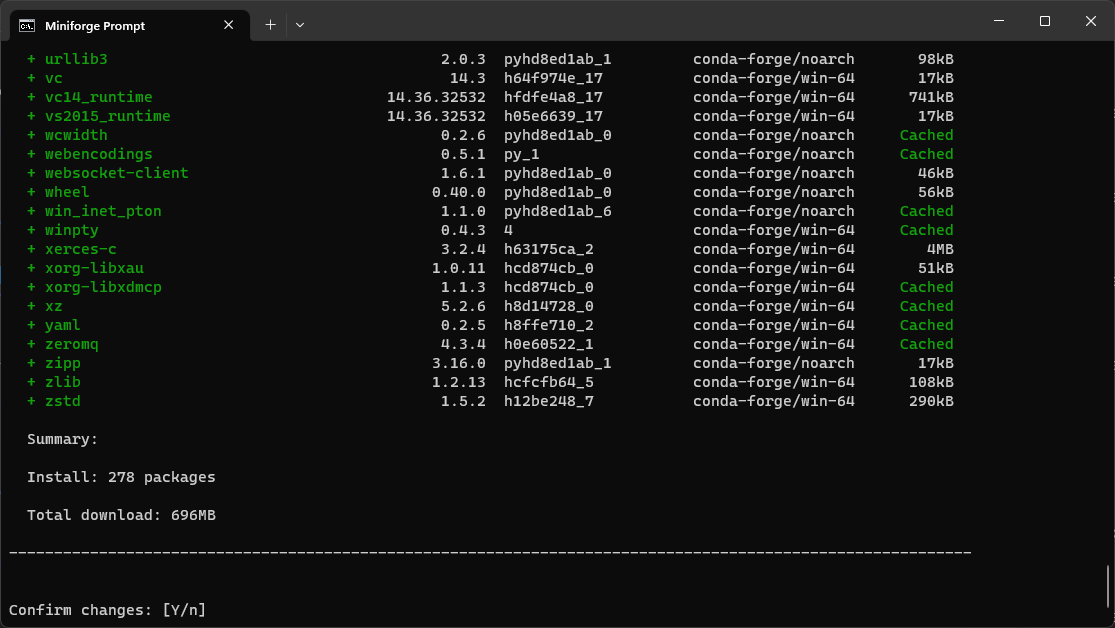
After mamba finished downloading and installing, activate the environment by typing
mamba activate pywapor_env
To start jupyter lab type:jupyter labWith this command, you will open Jupyter Lab in your web browser application. See below for an example of JupyterLab interface and the explanation of its components.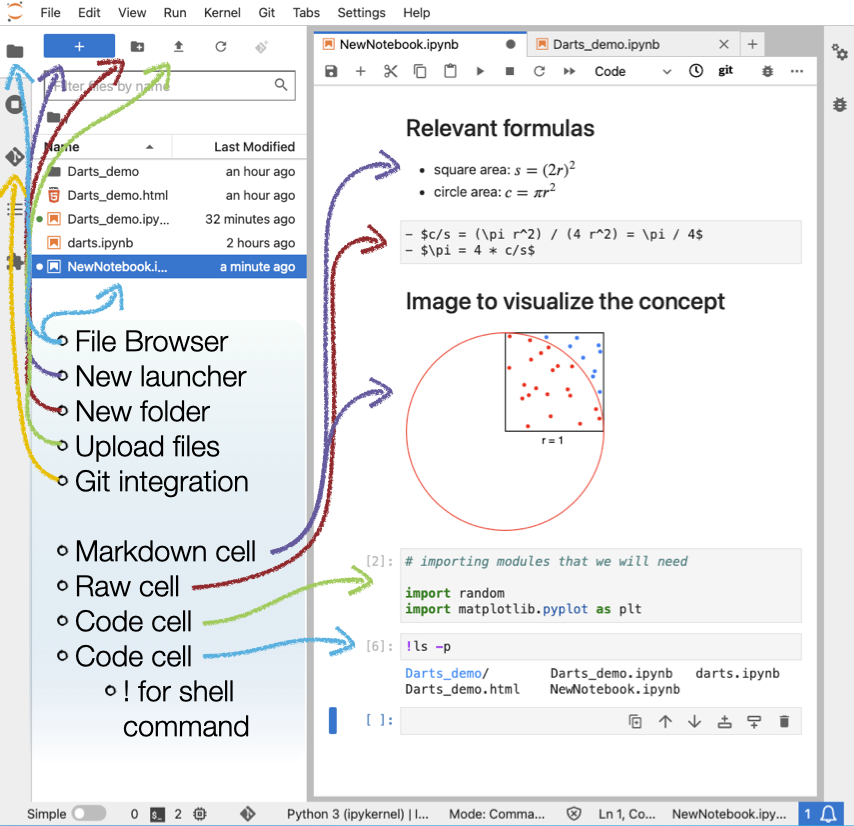
(© Copyright CodeRefinery team)
Now, you're ready to go to the next step Tutorial 2: Running pyWaPOR for test case, in which you will create your first Jupyter notebook to run pywapor!
------------------------------------------------------------------------------------------------------------------------
If you're interested in running WAPORMOOC notebooks, you can follow this steps: Create WaPORMOOC environment.
If you're interested in more examples of Jupyter notebooks, follow this link More tutorials using Jupyter Notebooks.
4. Create WaPORMOOC environment
If you like using jupyter lab, you may want to use it for the WaPORMOOC scripts as well, Now you have to create a different environment with the name wapormooc and install some useful packages such as matplotlib, jupyter lab, pycrs, numpy and git .
1. At the Miniforge Prompt type the following command and press <Enter>:
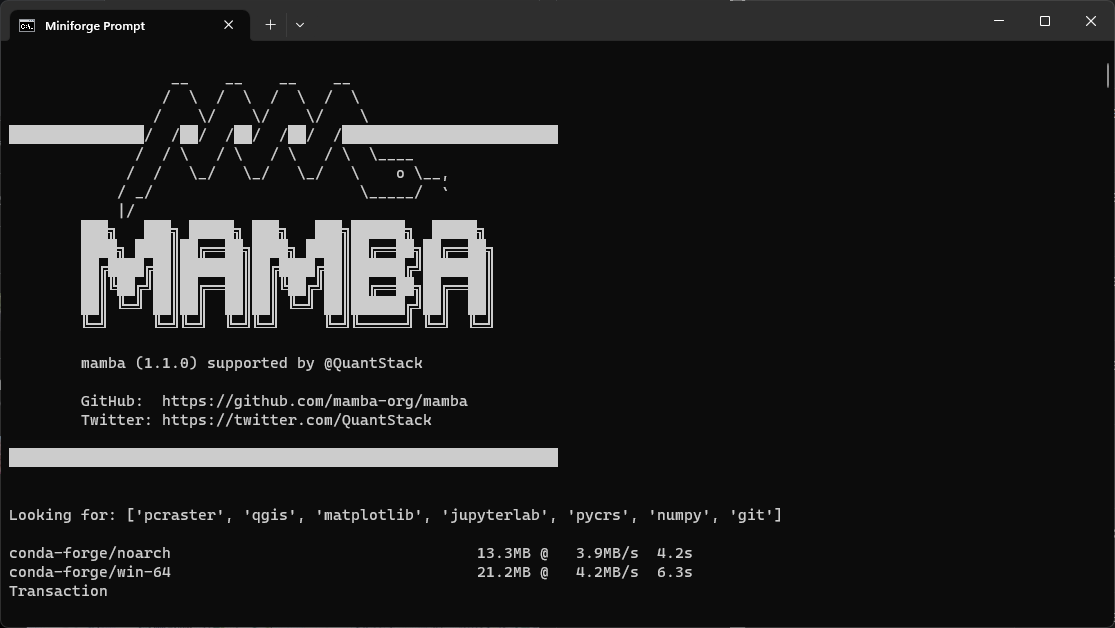
mamba create --name wapormooc qgis matplotlib jupyterlab pycrs numpy gitMamba will look for the packages.
2. Confirm the changes by typing Y.
When the packages are downloaded and installed Mamba will tell you how to activate the environment:
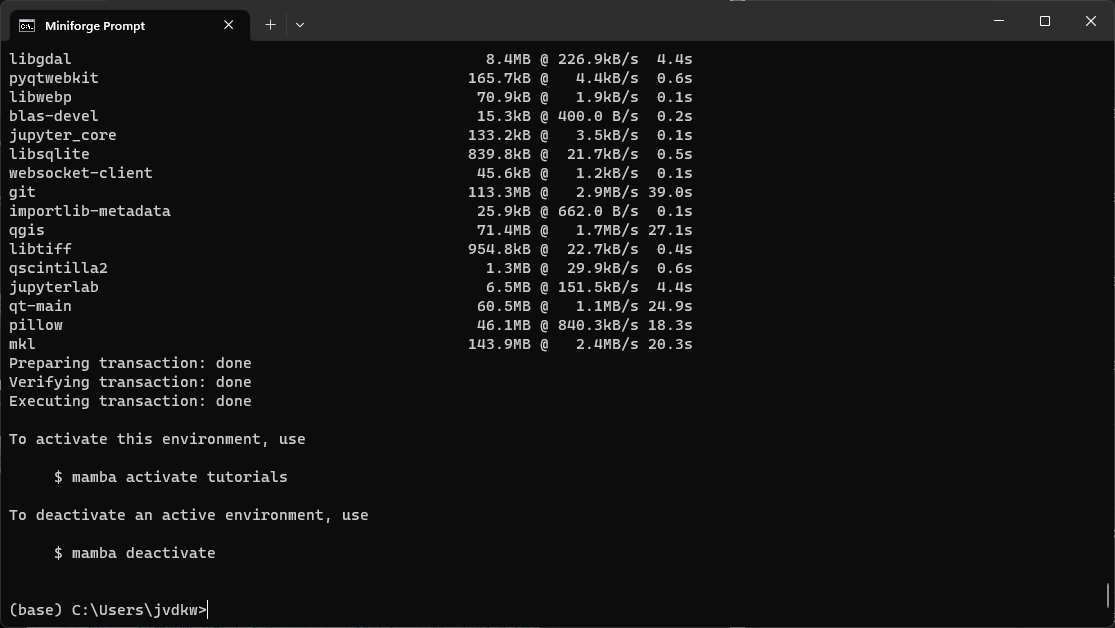
3. Activate the tutorials environment by typing:
mamba activate wapormoocYou'll use this command in the future every time you start a new Miniforge prompt in order to use the wapormooc environment.
In the next subchapter you'll learn how to clone the WaPORMOOC repository with tutorials from the GitHub repository.
4.1. Clone a github repository
Now we've setup the environment, we need to get the Jupyter Notebooks and data that we'll use in this course.
The Jupyter Notebooks and related data are stored in a GitHub repository. We can easily clone the GitHub repository, which means that we'll create a local copy of the contents of the repository.
Git is a distributed version control system that tracks changes in any set of computer files and is used for coordinating work among programmers collaboratively developing source code during software development.
With git commands we can interact with git repositories such as GitHub. A nice way to learn git commands is the serious game Oh My Git.
In the next steps we're going to use git commands to clone the GitHub repository with the Jupyter Notebooks and related data.
1. Use the commands to go to the folder where you want to save the tutorials (note that the next step will create a subdirectory WaPORMOOC there).
2. Go to https://github.com/wateraccounting/WaPORMOOC.
3. Click the Code button.
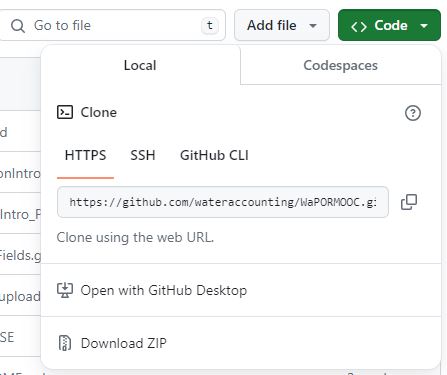
4. Copy the HTTPS link.
5. Now go back to the Miniforge Prompt and use the following git command:
git clone https://github.com/wateraccounting/WaPORMOOC.git
Note that the https link was pasted.
This will download all the WaPORMOOC materials of this and the next module to the subdirectory WaPORMOOC.
In the next subchapter you'll learn how to launch a Jupyter Notebook locally.
4.2. Use Jupyter Notebooks with Jupyter Lab
Now we have the Jupyter Notebooks and related data cloned from the GitHub repository, we can use them.
1. Go to the WaPORMOOC subdirectory
2. Launch Jupyter Lab with the following command:
jupyter lab
This will open your browser and you can choose the notebook.
If your browser doesn't open automatically or if you would like to use another browser, check the links that are shown on the screen.
5. More tutorials using Jupyter Notebooks
If you want to try more things out then follow the course on Python for hydrological applications, which includes applications such as:
- Spatial interpolation of borehole data
- Stream and Catchment Delineation
Dont forget to install the correct environment for running these examples.