Tutorial 1: Installing Jupyter Notebook
For running pywapor locally on your laptop, you need to install Python program and install pywapor package in your python environment. This can be done in several ways, however, we recommend you use Mamba package manager, because it is fast, robust, and cross-platform.
Once you have python and pywapor installed, you can run pywapor model through Python console (command line interface). However, we recommend you to use Jupyter Lab interface. JupyterLab is a web-based interactive development environment for notebooks, code, and data. It will allows you take notes, interact with you python scripts and save the outputs in digital notebooks.
In this book, we will take you through the steps to install python and python packages on your PC. The instructions are adapted from GISOpenCourseWare
3. Create a Python environment
3.1. Create pyWaPOR environment
To install the pyWaPOR environment, go to your Miniforge Prompt and type
mamba create -n pywapor_env pywapor jupyterlab geopandas
Once the prompt below popped up, type Y then ENTER to confirm installing new environment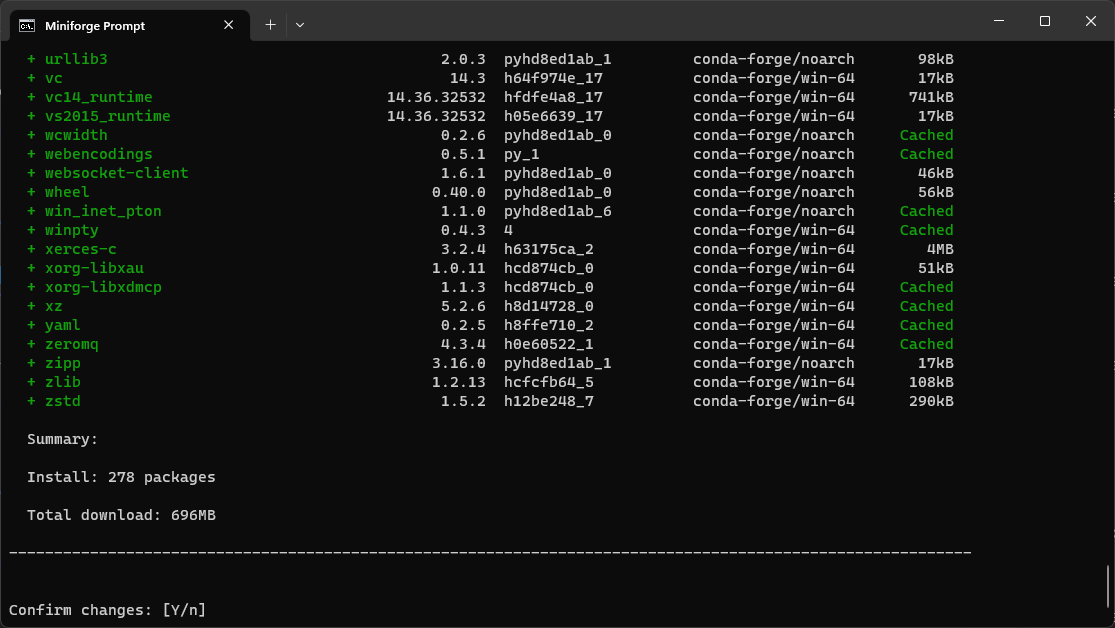
After mamba finished downloading and installing, activate the environment by typing
mamba activate pywapor_env
To start jupyter lab type:jupyter labWith this command, you will open Jupyter Lab in your web browser application. See below for an example of JupyterLab interface and the explanation of its components.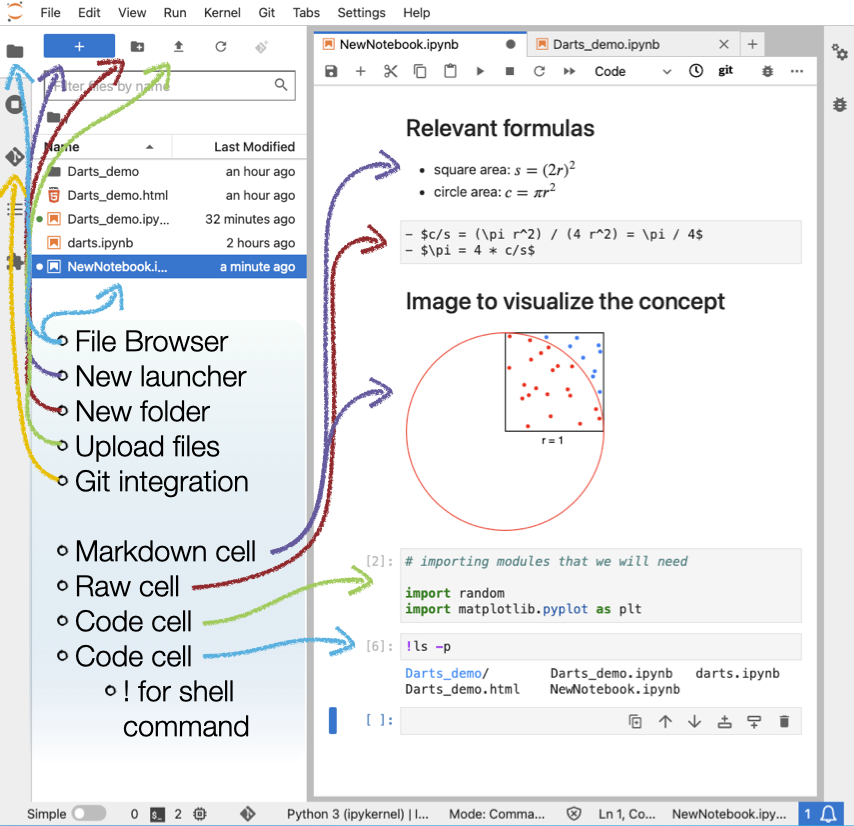
(© Copyright CodeRefinery team)
Now, you're ready to go to the next step Tutorial 2: Running pyWaPOR for test case, in which you will create your first Jupyter notebook to run pywapor!
------------------------------------------------------------------------------------------------------------------------
If you're interested in running WAPORMOOC notebooks, you can follow this steps: Create WaPORMOOC environment.
If you're interested in more examples of Jupyter notebooks, follow this link More tutorials using Jupyter Notebooks.